


Glazed and Confused? How to Nail Pottery Renders in C4D
Explore how to create beautiful hand-thrown pottery renders in Cinema 4D using Redshift and Greyscalegorilla Plus. Learn lighting tricks, material blending techniques, and how to use cloth simulations for realistic results.
Download the scene file and start creating today.
Create Cinematic Pottery Renders Using Studio, Redshift, and Plus Assets
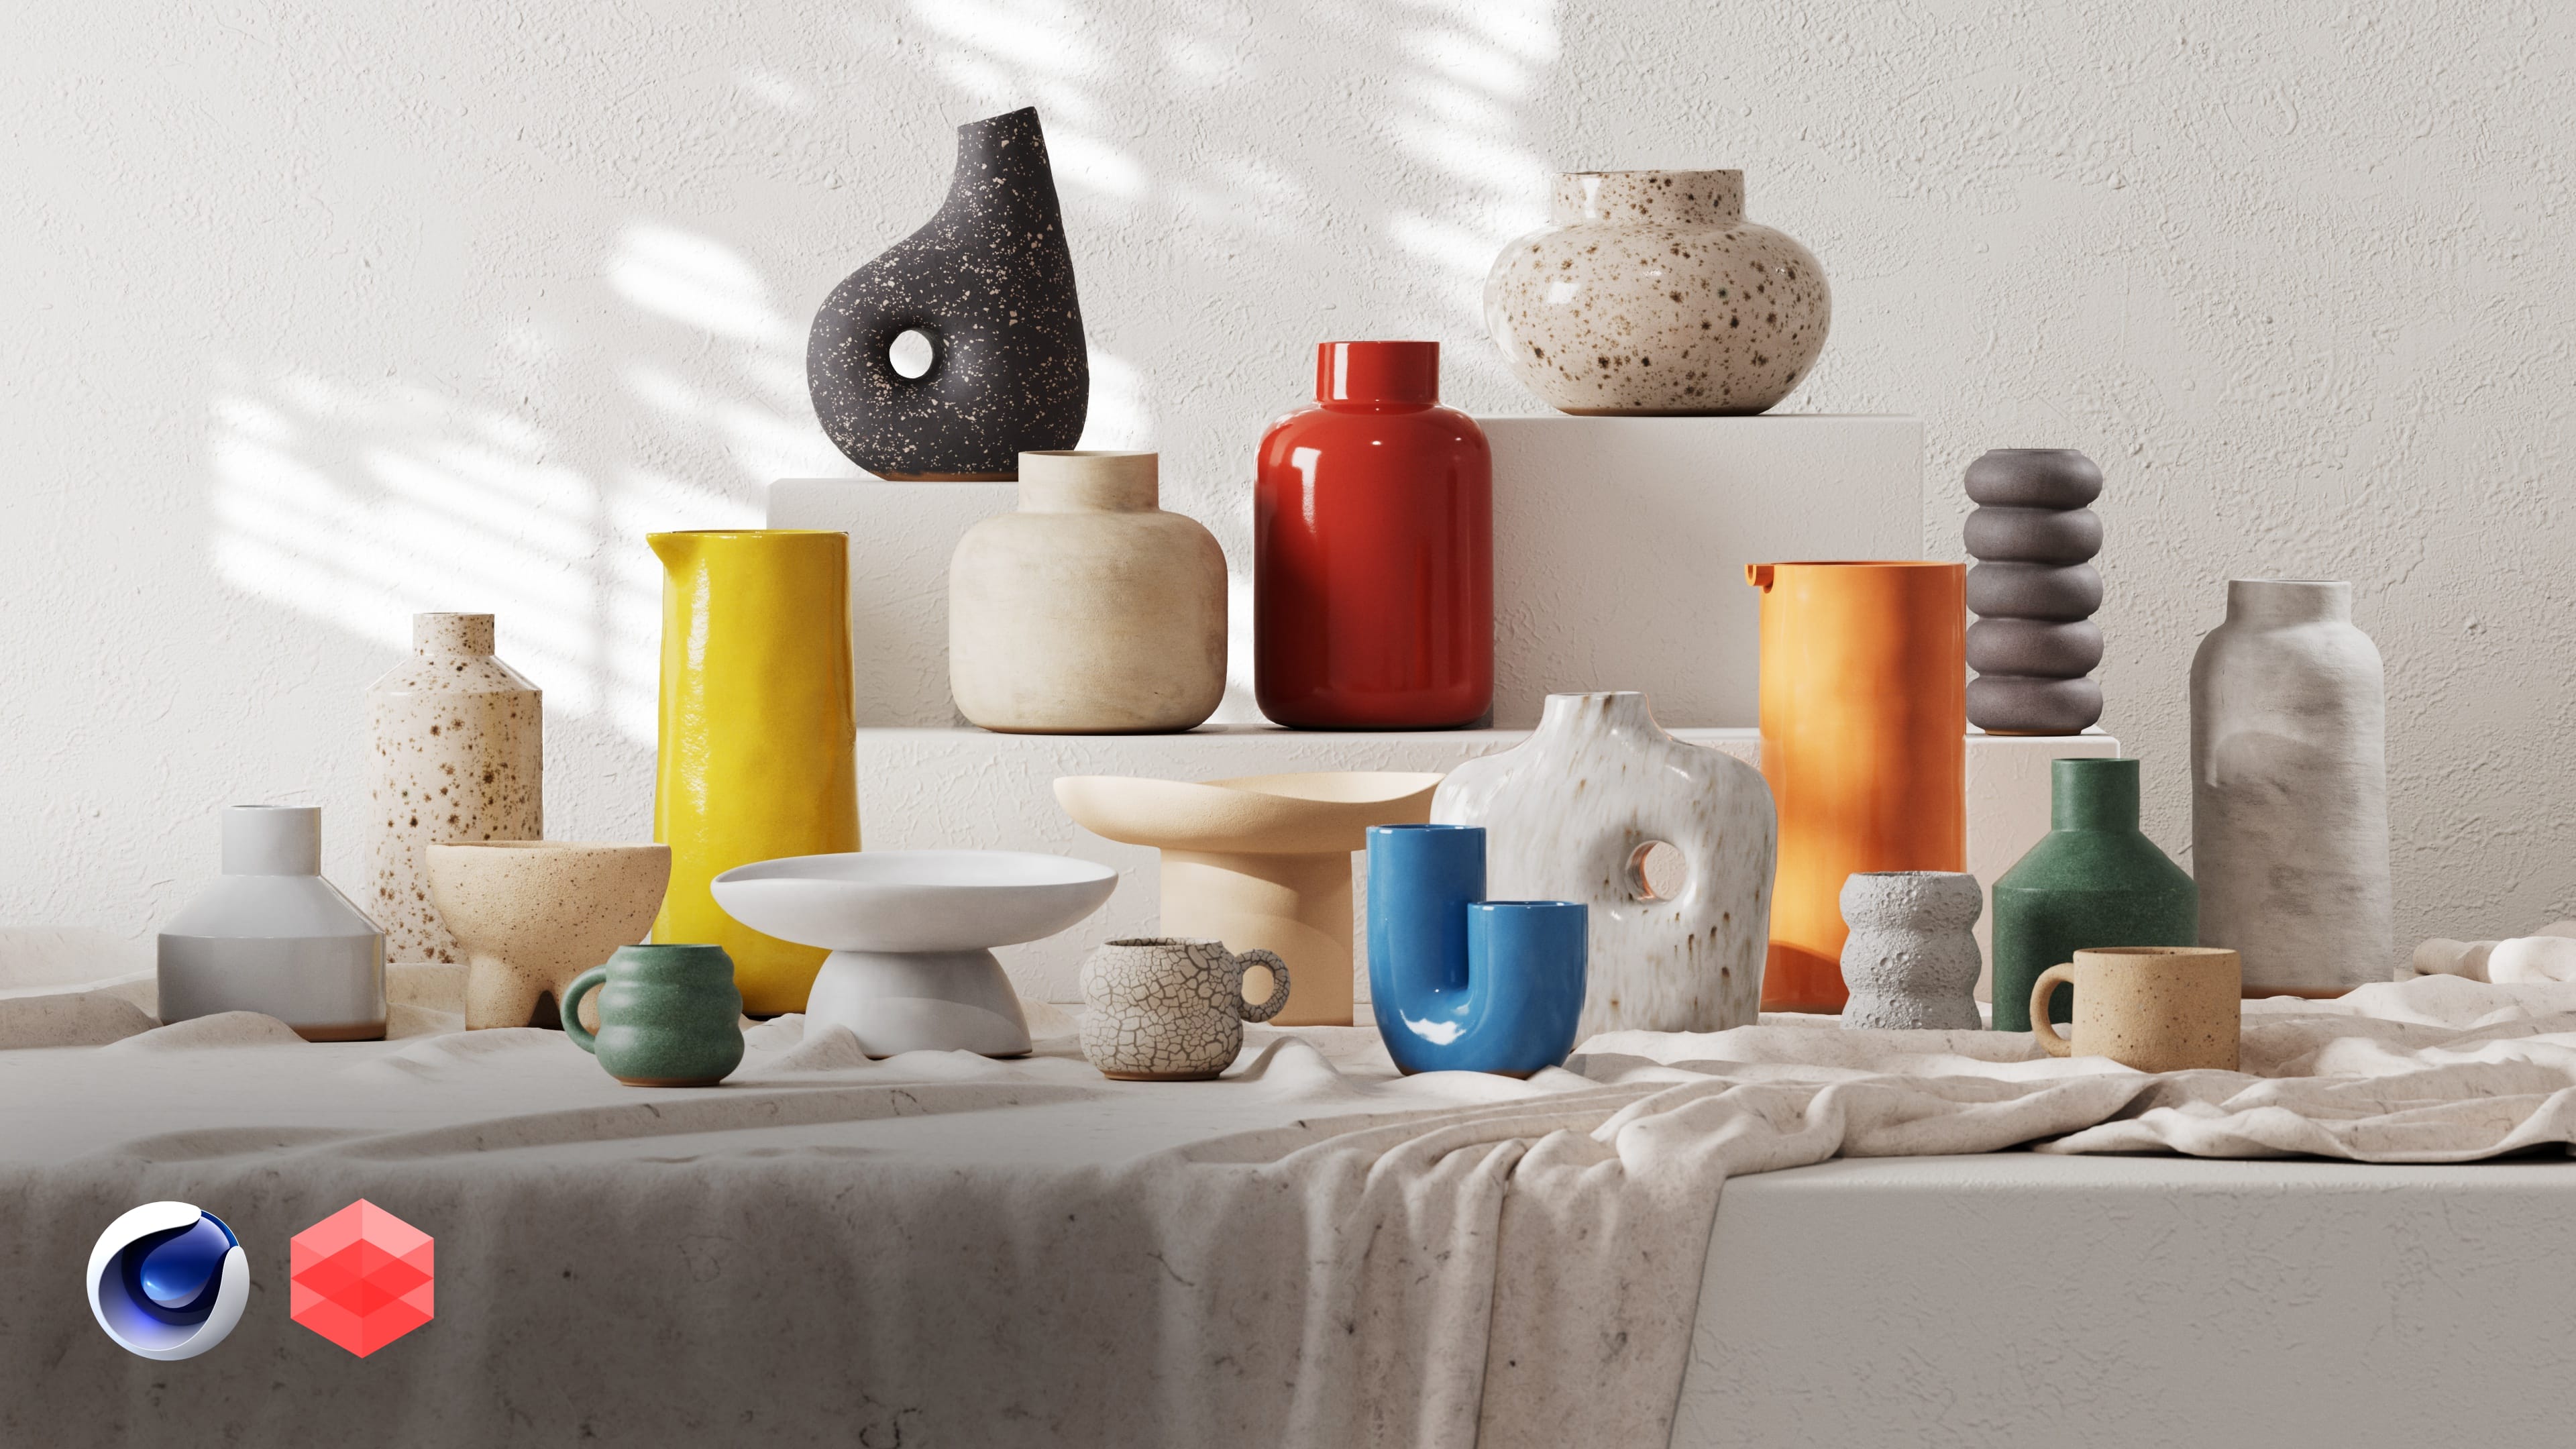
A few mugs, a cloth sim, and the right lighting. What looks like a simple pottery scene is packed with smart techniques. Greyscalegorilla artist Dan Zucco used Studio and Redshift to build a cinematic render that’s both thoughtfully crafted and ready for production. In this tutorial, Nick dissects Dan’s original scene, exploring each step of the process along the way.
With handcrafted ceramics, detailed textures, and dialed-in lighting, this scene shows how to get stunning results faster using the Studio App. And yes, we’re sharing the scene file, too.
Why Pottery Renders Are Harder Than They Look
Ceramic renders are deceptively tricky. You need the right balance of gloss and matte, subtle texture in the clay, and natural lighting to avoid that sterile 3D look. Cloth dynamics, realistic material blending, and proper light placement are the key ingredients to making these renders feel handmade.
How We Built It Inside Cinema 4D
Materials: Blending Clay and Glaze
One of the key details in this scene is how the materials are blended. Using vertex maps and Material Blenders, Dan created a subtle transition between matte, unglazed clay at the base and a glossy ceramic glaze at the top. Linear fields drive the blend across multiple objects, giving it a handcrafted look without feeling procedural.
The materials come from our Handcrafted Ceramics Collection, developed in collaboration with our friends at Ceremony, a Las Vegas-based studio specializing in hand-thrown pottery. They created a series of custom glazes exclusively for this collection, giving these textures the kind of real-world nuance you can’t fake. Ideal for product shots, these materials bring an extra layer of authenticity to your renders.
To match that quality, the scene uses models from our Handthrown Pottery collection in Plus. These high-res, artist-built assets were designed for close-up product renders, with just the right imperfections to make your materials look even better.
Lighting: Painterly but Controlled
Lighting sells realism. This setup uses a simple Redshift Sky rig (no HDRI) plus strategically placed area lights with gobos for broken light and shadow. Bounce cards and a shadow catcher ground the objects. Everything is placed to guide the viewer’s eye without washing out the details.
Cloth Sim: Simple but Effective
Nick added a cloth simulation under the ceramics for that extra realism. The cloth was cached after the simulation, then converted to a static mesh with subdivision for a clean render. It’s a good example of using light simulation for still renders without slowing down your workflow.
Grab the Scene File and Explore
Greyscalegorilla Plus members can download the scene file in member resources, including:
- Handcrafted Ceramic materials
- Handthrown Pottery models
- Fabric materials for the cloth sim
- Lighting setups built with Redshift
- Fully built scene with everything ready to render
Inside Studio, you’ll find thousands of materials, textures, HDRIs, and models built for quick one-click imports into Cinema 4D, Blender, Houdini, and Unreal.
Why You’ll Want to Dive Into This Scene
If you’ve been stuck fiddling with nodes or frustrated by flat renders, this scene shows you how to shortcut your way to photorealistic pottery renders. From natural light setups to handcrafted textures, you’ll learn how professionals set up their scenes without wasting hours on the technical bits.
👉 Already a Plus member? Download the scene file here.
👉 Not a member yet? Start your free trial and get access today.