


How To Make Better Looking Wood Renders
Wood You Like to Learn How?
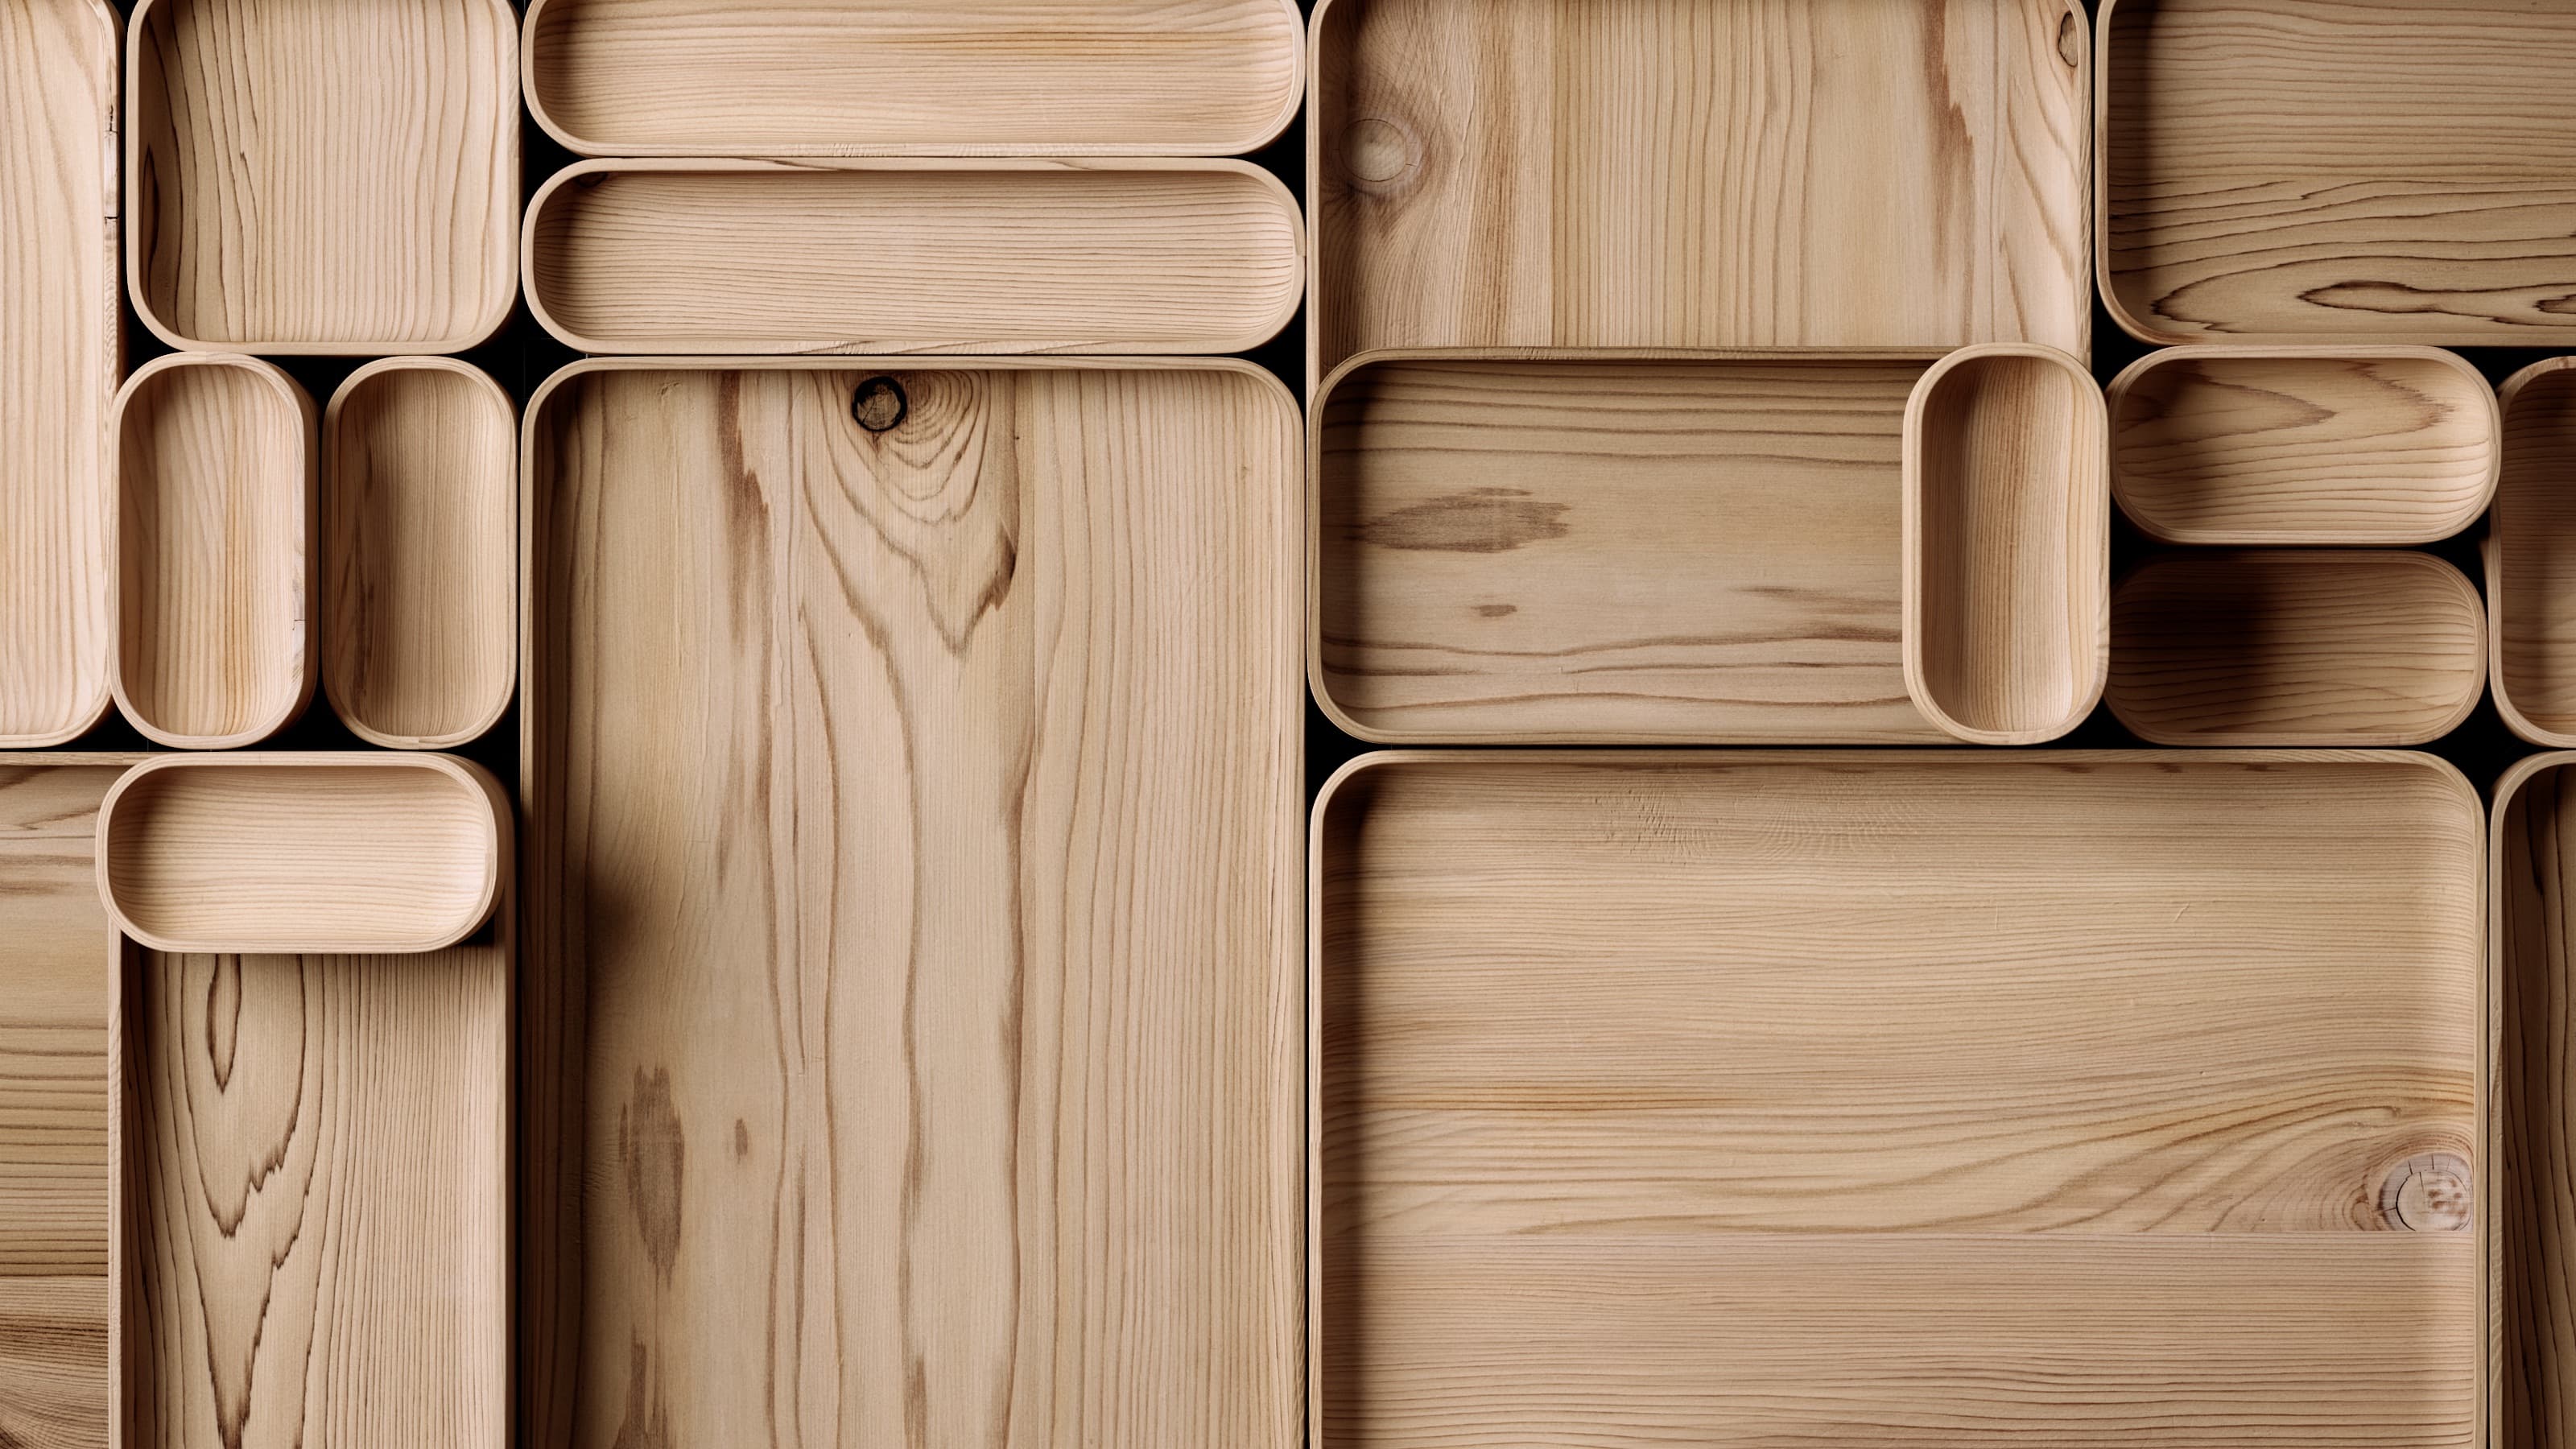
Are you trying to get your wood materials looking great in your favorite 3D app? Sometimes you may not like the way your render looks based on a few different factors. It could be that you are using a low-quality texture or material, but odds are it really comes down to lighting and the randomness of how wood looks in the real world.
In this tutorial Chad Ashley shows you how he uses Redshift in Cinema 4D to add random variations to textures with the Jitter node and how to use multiple materials to create realistic looking plywood.
You can Download FREE wood materials inside of Greyscalegorilla Studio and follow along.
Let’s Talk Nanotubes and Chatoyance
Wood is made up of tiny cell structures called nanotubes. They are similar to fibers and are very tiny. Nanotubes vary in different types of wood and affect the highlight reflection of light. This metallic like shine is called chatoyance.
For the Unfinished Wood materials scanned and captured for the Greyscalegorilla asset library, the team captured chatoyance in a metalness map. This keeps the accurate reflections you would see in real wood.
In this tutorial, we are going to use the Red Cedar material that you can get for FREE when you download the Greyscalegorilla Studio app. Just create a free Greyscalegorilla account and you’ll unlock 50+ free materials, textures, models, and more.
Using the Jitter Node
If you have a scene with multiple objects using the same material, you’ll notice that everything looks the same. Same color, same tone, same texture, same everything. We want to randomize this with the Jitter node in Redshift for Cinema 4D.
Jitter allows you to randomize different things based on user data, name id, or object id. Within the node you’ll find a few options.
- Color Jitter
- Float Jitter
- Integer Jitter
Color Jitter changes the HUE, Value, and Saturation. Float Jitter will allow you to randomly offset the UVs, which is what we want to do first. With the texture offset, everything will look randomized so you don’t have the same knots in the same place on every object.
Connect the outFloat to the Base Color, find the General > UV > Remap selection and plug it into Offset.
Then repeat this step and plug the outFloat into Texture Metallic, Texture Roughness, Texture Normal, and Texture Height.
Now back in your Float Jitter settings where by default you will see the Float Min and Float Max set to 0. Increase the Float Max to 1 to start randomizing the texture, and then adjust the Float Seed until you find a look you are happy with.
Make Variations to the Texture Color
So now we want to change up the look of the wood so it may appear like they were cut from different trees. To do that, add another Jitter node to the Base Color.
Connect the outColor of the Texture Base Color to the input Color of the Jitter.
Connect the Jitter outColor to the Base Color of the Material.
By default in Redshift, this Jitter node will add variation in nearly all settings and for Wood we want to scale that back.
Drop the Hue Variation Max back to 0.
For Saturation we want to limit the Max to a much smaller range like 0.05 and decrease the Min to something like -0.1
For Value we also want to limit the Max to something like 0.1 and the Min to -0.15
Now you can play with the Seed to find your favorite look.
Tips for Plywood
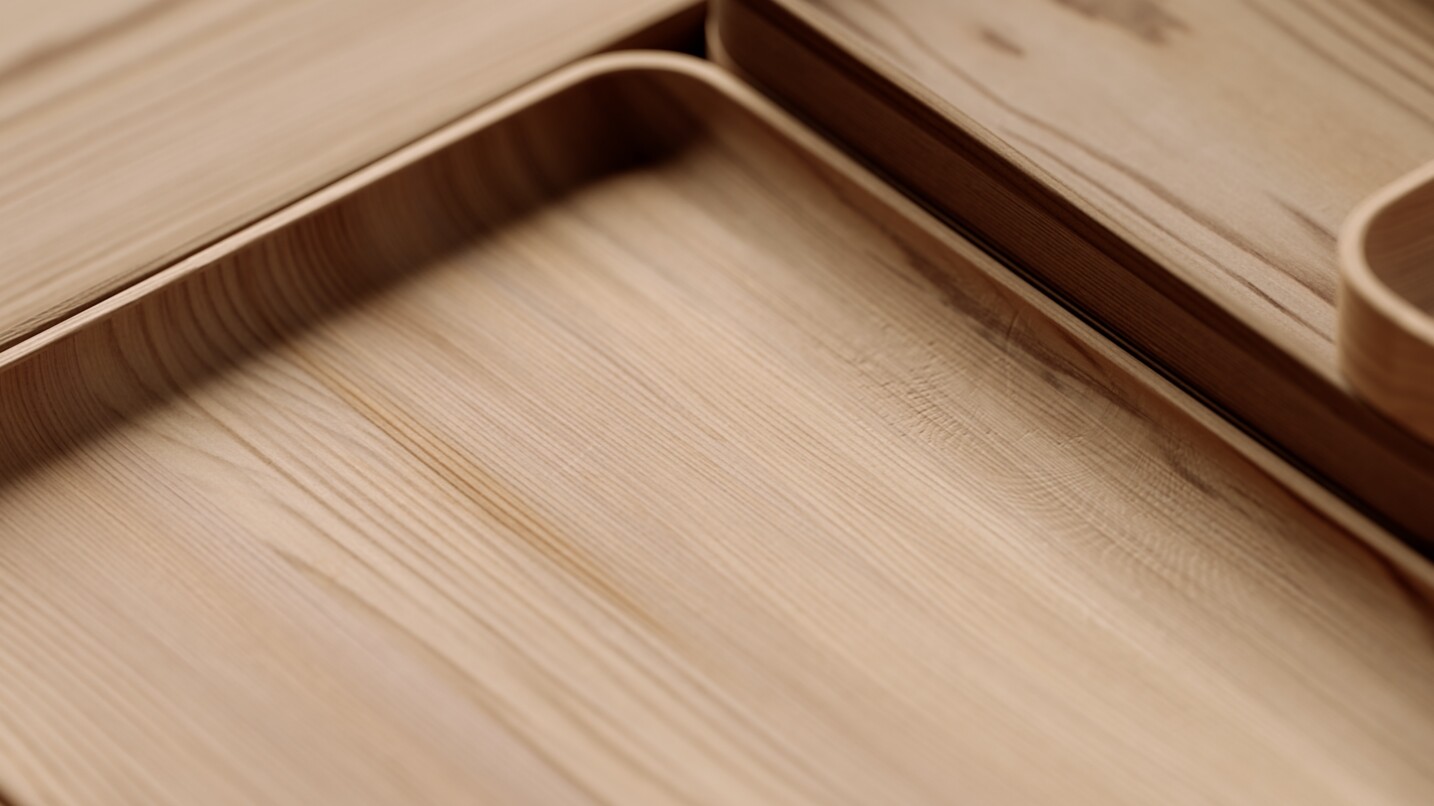
Plywood in general seems to be one of the most asked about type of wood material. Specifically how to get the plywood edge look where the top and bottom look like wood and the edges have the lined layers like a real sheet of plywood.
There are a few ways to do this, but this is Chad Ashley’s favorite way to pull off this look.
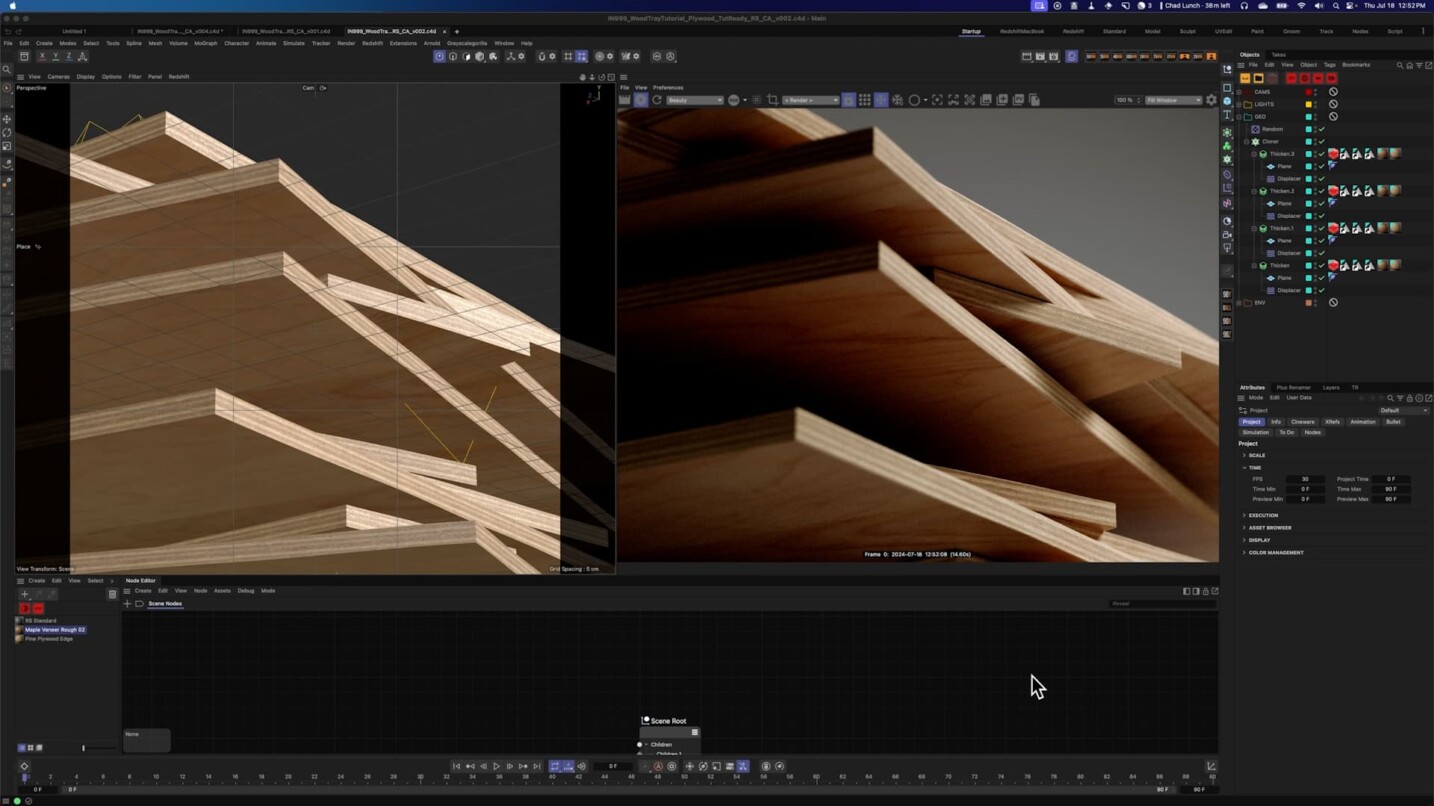
Create your plywood by making a 4’x4′ plane object.
In C4D add a Thicken generator and make the plane a child of the Thicken.
In your Attributes, set your height to 1 inch thickness. This gives your a 4x4x1 sheet of plywood.
Thicken Selections
Inside of the Thicken generator Attributes, you’ll find Selections which will allow you to assign materials to different Polygons.
Enabling the Shell will allow you to give the edge a different material.
Now apply the wood material you want to use for the main object.
Here we will search for an Oak Veneer inside of Greyscalegorilla Studio. Just download the asset and with 1-more click send it to your object.
For the edge, in Greyscalegorilla Studio search for the Plywood Edge material that is included with a Plus subscription.
Apply the Plywood Edge material to your Thicken generator, and under the Attributes set the Selection Tag property to PB.
Now you may see that the edge is running vertically when you want it to run horizontally like a sheet of plywood. The super simple fix is just to go to the Projection tag and change it from UVW Mapping to Cubic.
Now scale down the texture mode until it looks like you have a few layers of plywood.
For finer detail, you can do the same technique on the top and bottom of the plywood as well by changing the Projection settings to Cubic as well.
Dealing with Harsh Edges
If you want to clean up the edge of your plywood, a great simple technique is to apply a round corner.
Open up the Plywood Edge material in the Node Editor.
Add a Round Corners node and a Bump Blender node.
Connect your Round Corners out to the Bump Blender Bump Input.
Connect your Bump Map out to the Bump Blender Input.
Connect the Bump Blender to the Bump Map of your Material.
In your Attributes, change the Blend Weight to 1.
Adjust the Radius to 0.1.
Repeat this process for the wood material.
The best thing about this setup is that it’s completely parametric. That means any adjustments you make to your plane will reflect properly, so you textures won’t end up looking weird if you make a smaller sheet of plywood.
🪵 See Wood Materials and Textures
Get Started for FREE
Start using 50+ popular Greyscalegorilla assets for free. Simply download Studio, activate your account, and connect to your favorite 3D apps.