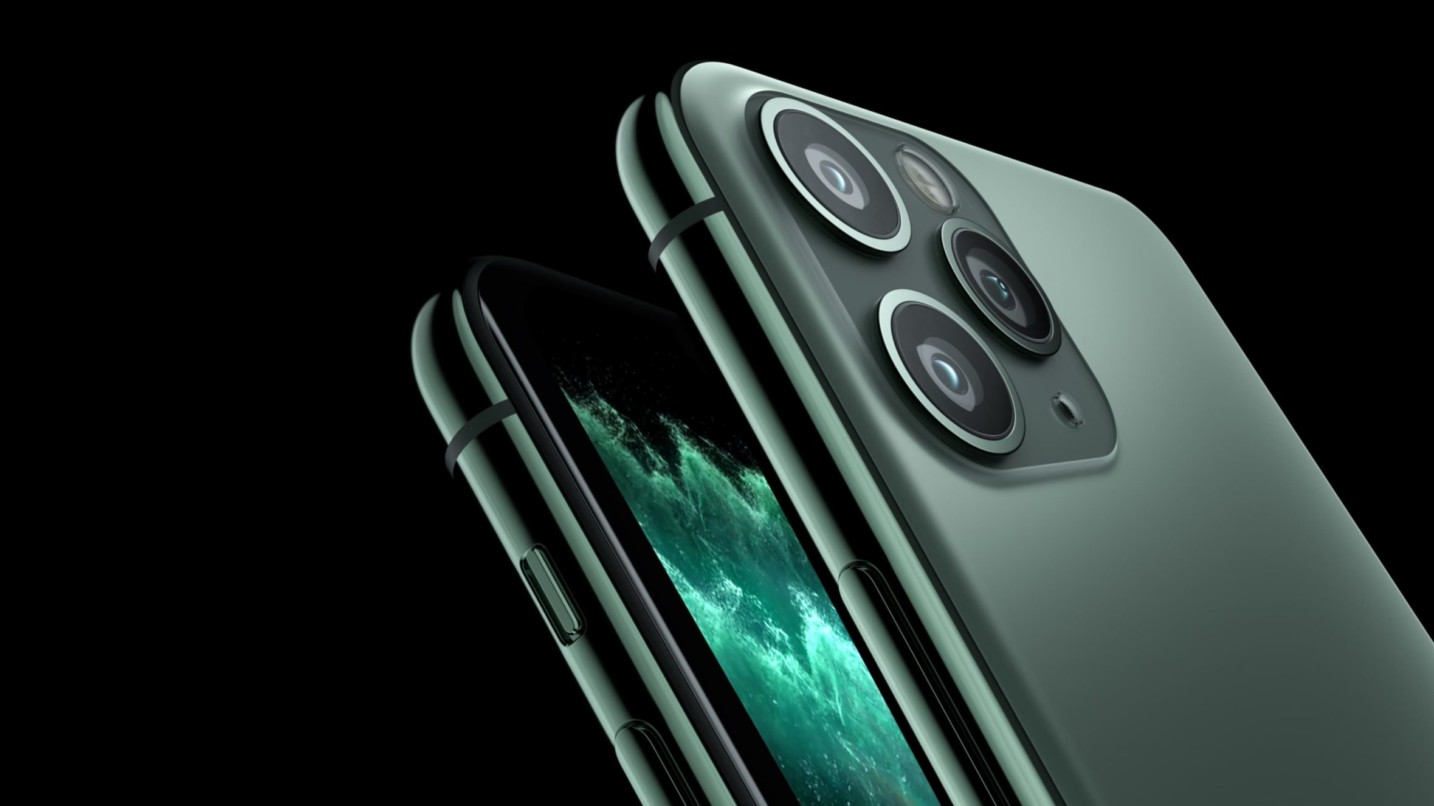
Breakdown the composition, lighting, and render settings of this iPhone render.
All images via Nik V. of R4D Studio.
After seeing the jaw-dropping renders from R4D Studio on Twitter, we reached out to creator Nik V. to talk about his product render process.
He tells us all about his work creating product renders, then guides us through his latest render of an iPhone 11. Take a look at his process and breakdown this Cinema 4D and Octane project.

Interview
Michael Maher: Before we get into your project, let’s start with the basics. Can you tell me a little bit about how you got into 3D?
Nik V: Yeah. Well I started doing CG and 3D rendering as a hobby. When I bought my first decent computer, it wasn’t really for a 3D, it was more for gaming.
I discovered 3D rendering and gave it a shot. So I started learning by watching the YouTube tutorials and it got me pretty far.
I started doing some basic modeling, some product rendering. Then I started posting on Twitter cause that’s what everyone was doing. So that’s how I learned about the community.
I started posting, getting some, and yeah, worked my way up getting constructive criticism from established artists. That’s pretty much how it started. And here we are now.
MM: Has this become a career for you? Do you do any freelance work, or work in a studio?
NV: I’m pretty much freelancing. It’s not my main job, but it’s a little side hustle.
MM: Do you have any particular specialties? I mean your product renders certainly caught my attention.
NV: I do lots of different types of renders, cause I don’t know which field I want to do to specialize in. I started with abstract rendering, then I went to product rendering, then interior, then automotive.
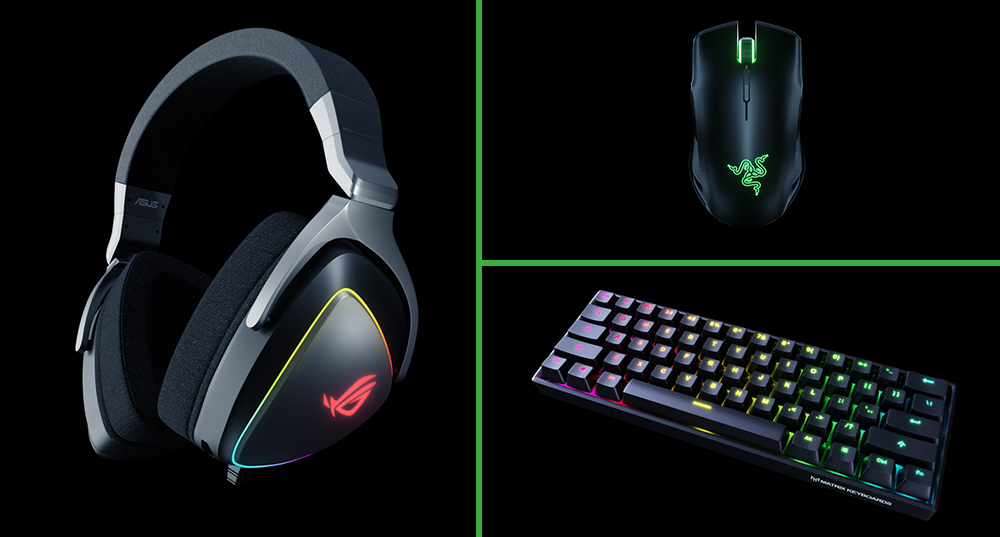
I’ve gone back to product rendering because I think it’s really needed in the industry. So on my website you’ll see a few renders for various companies.
I’ve worked mostly peripherals, so keyboards, mouses, headsets and all that kind of stuff.
MM: When you are creating these types of product renders, are you modelling everything yourself, or are they providing assets?
NV: It depends on the client. Some of them already have the models, some of them don’t. I do some modeling myself, usually the keyboards and the mice.
For my experiments, I get my models off TurboSquid. They have really good quality and for affordable prices.
MM: When you model yourself, are you using Cinema 4D, or ZBrush, or any other tools?
NV: I use Cinema 4D as my main software, along with a script bundle for C4D called HB Modeling Bundle. It has a bunch of scripts that allow you to do some good topology, or re-texturing, editing the UV’s, there’s a bunch of really useful scripts.
MM: Do you have a go to render engine?
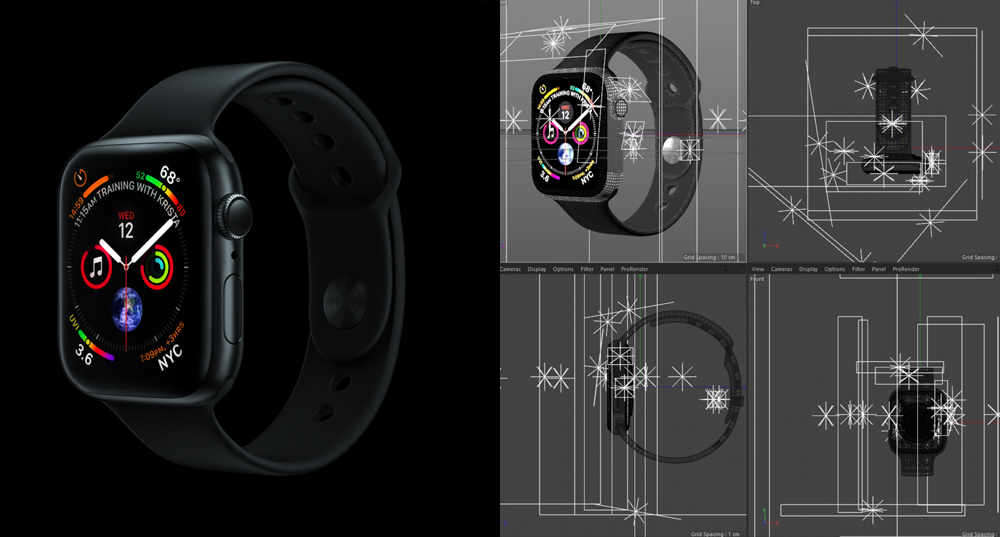
NV: I switch between Corona and Octane, but both the Apple watch and the iPhone where rendered with Octane.
MM: We will dive more into those projects here in a bit, but are there any other tools you tend to use quite a bit?
NV: Yeah, so I started doing product rendering with regular Octane area lights, but I quickly realized that you don’t have all the control you want, like you don’t have the gradients and everything. So the Area Light Maps that you guys made are really helpful for that. You have all the lights that are used for a commercial photo shoots for the products and everything.
MM: What are you doing for materials?
I use some Octane materials and I make metal and glass materials. Those two and plastic are the most common for product rendering, and I make those procedural.
Besides the phone wallpaper and the Apple watch screen, those were images, other than that everything was procedural. So the bump map and everything else was all made through native shaders.
MM: Do you do any compositing when you’re done, or do you just tend to use empty backgrounds?
NV: For the product rendering it’s mostly black or white backgrounds, so there’s not much compositing. Usually my renders are pretty much done.
I may do some slight color correction in Photoshop, but usually the raw render is pretty close to the one I post.
MM: Alright, let’s get into your latest render, the iPhone 11. Can you just walk me through your process?
NV: For sure.
iPhone 11 Project Breakdown
For Nik’s iPhone 11 render, here are the tools he used to create the project.
PC:
- i7-8700k 6 cores (12 Threads) 3.70 GHz (4.70GHz OC)
- 32GB G.SKILL Trident 3200MHz
- Asus ROG Strix GTX 1080 8GB
Software:
- Cinema 4D R20 Studio
- Octane Render
- Greyscalegorilla Area Light Maps
- HB Modeling Bundle by Holger Biebrach
- Adobe Photoshop
Now let’s turn it over to Nik V and show you his process.
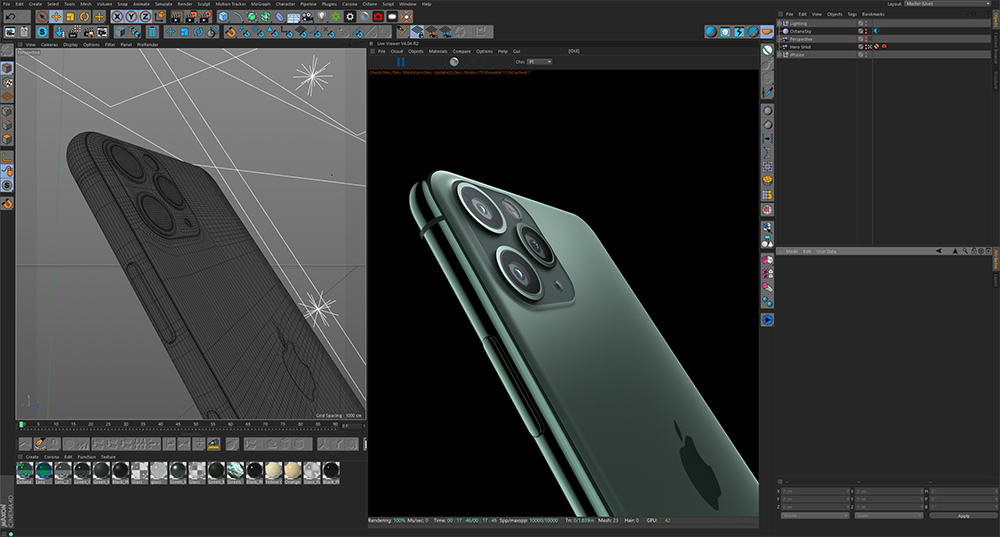
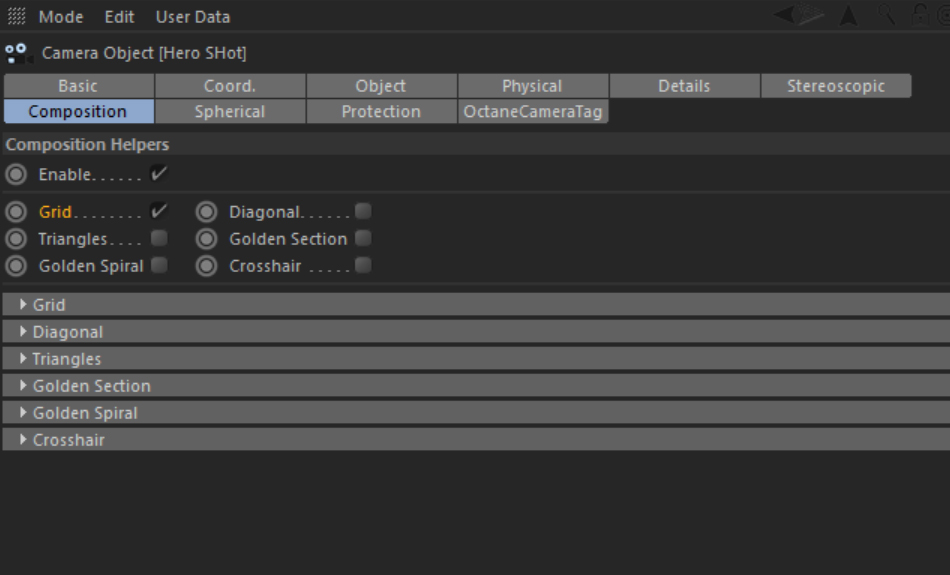
Composition and Camera Setup
I started the project by getting the essentials right. Essentials being Composition as well as Camera Setup.
I went ahead and setup a regular Cinema4D camera to frame the shot.
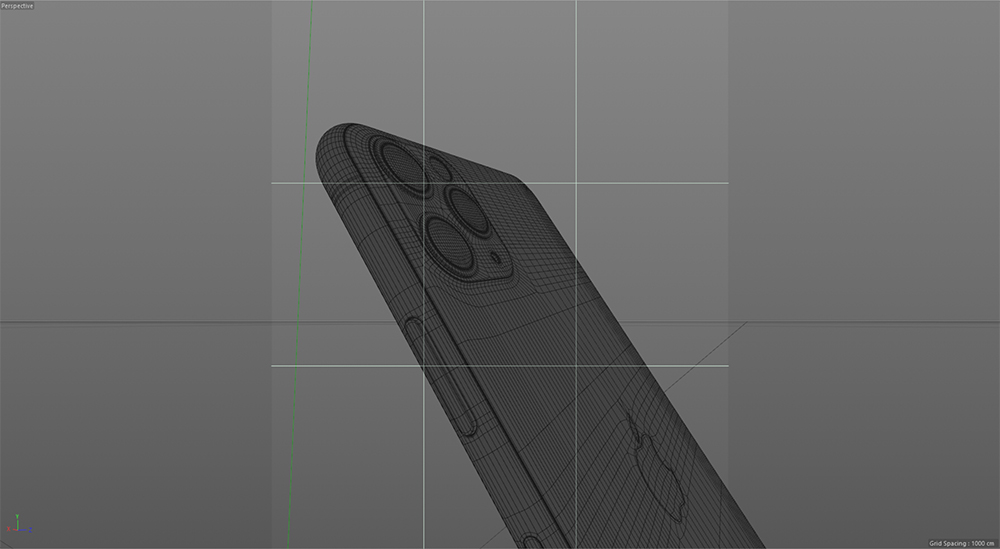
To help me frame the shot, I used the built-in Camera Grid feature. Using the Grid, I made sure that the star element (the triple cameras) were located at one of the Grid’s intersecting points. This is known as the Rule of Thirds.
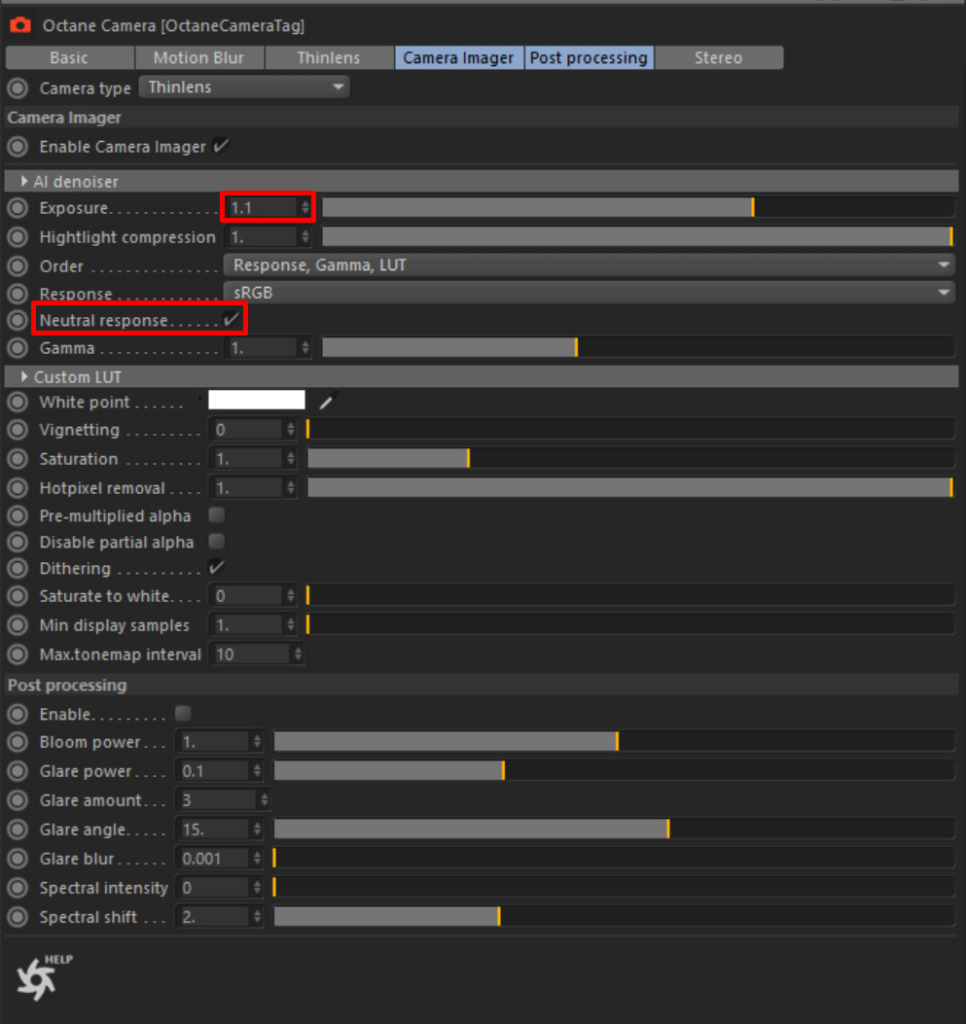
Camera Settings
Next up I went ahead and setup the Octane Camera tag. In this case, the settings were close to default. Only bumping the exposure up to 1.1, as well as checking the Neutral Response option.
No LUT, Post Processing or Depth of Field was used in the Octane Camera tag.
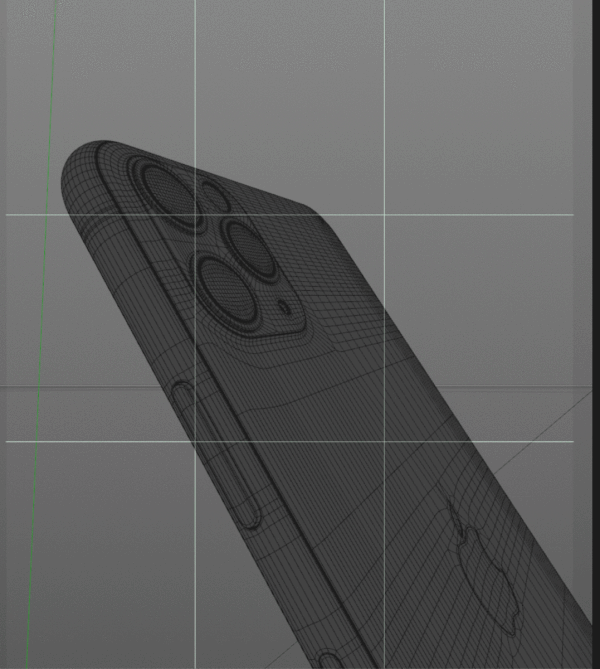
Material Creation
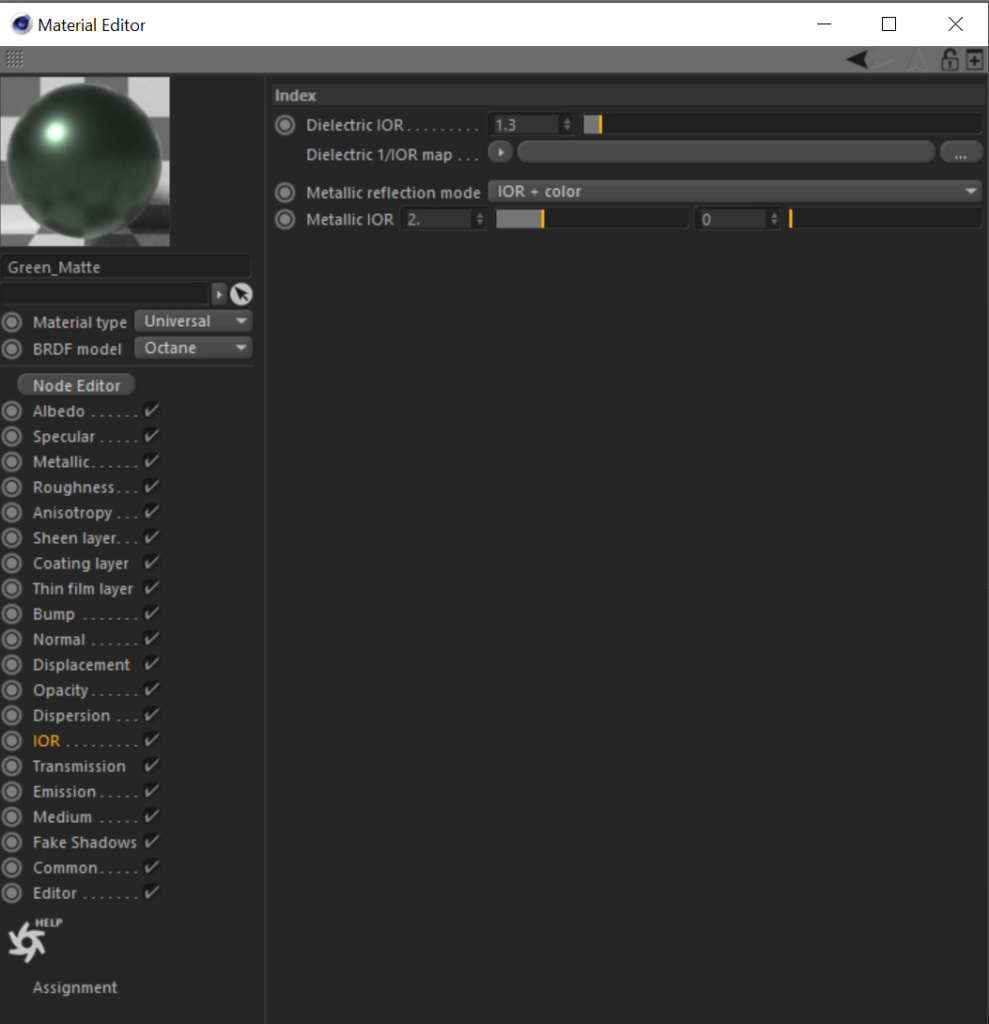
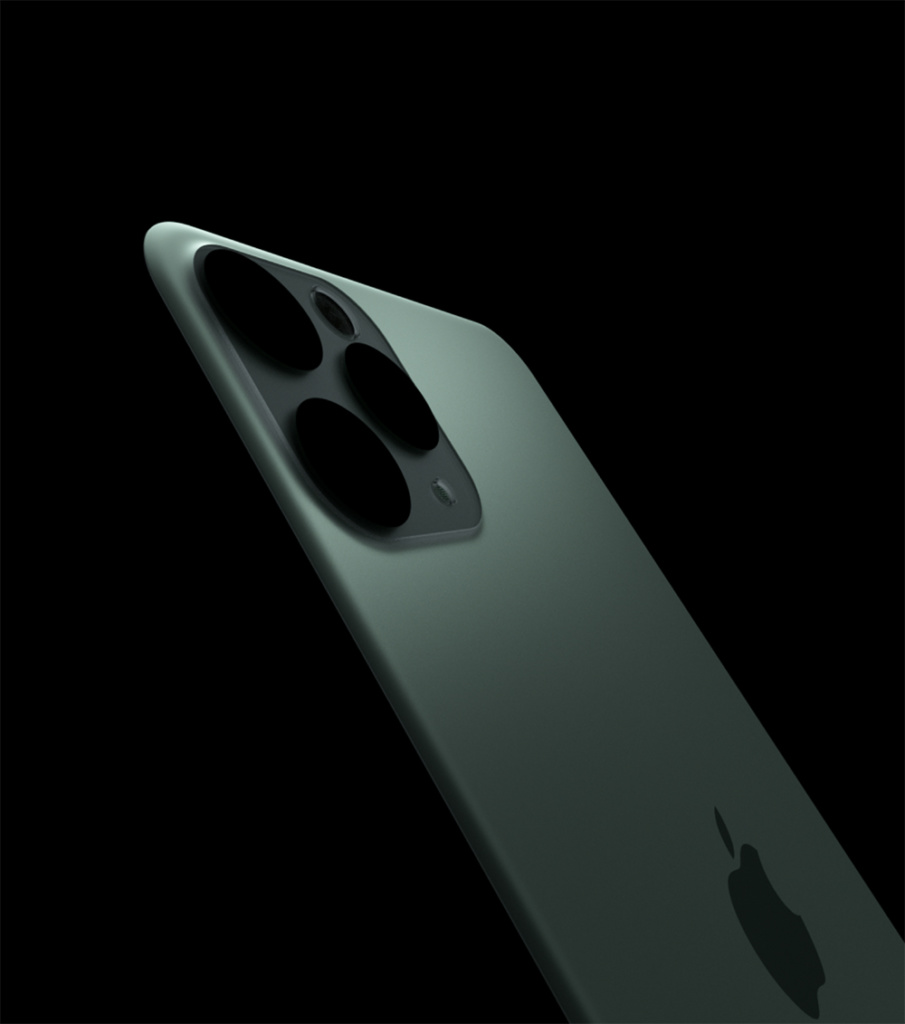
Next step was to setup the materials. I will breakdown some of the major materials. First off we have the Green Metal behind the matte glass. This is a really simple Universal Material.
I gave it a tint in the Albedo channel instead of the Specular since I believe it gives a better result for matte metals.
The second major shader is the glass. The iPhone 11 has a frosted glass back, different from any other iPhones in the past. For this shader, I used an Octane Specular material. I gave it some roughness, a slight green tint to the Reflection (Specular) and most importantly, a very slight green tint to the Transmission. The tint only has 1% saturation, but it goes a long way. Especially with lights close by.

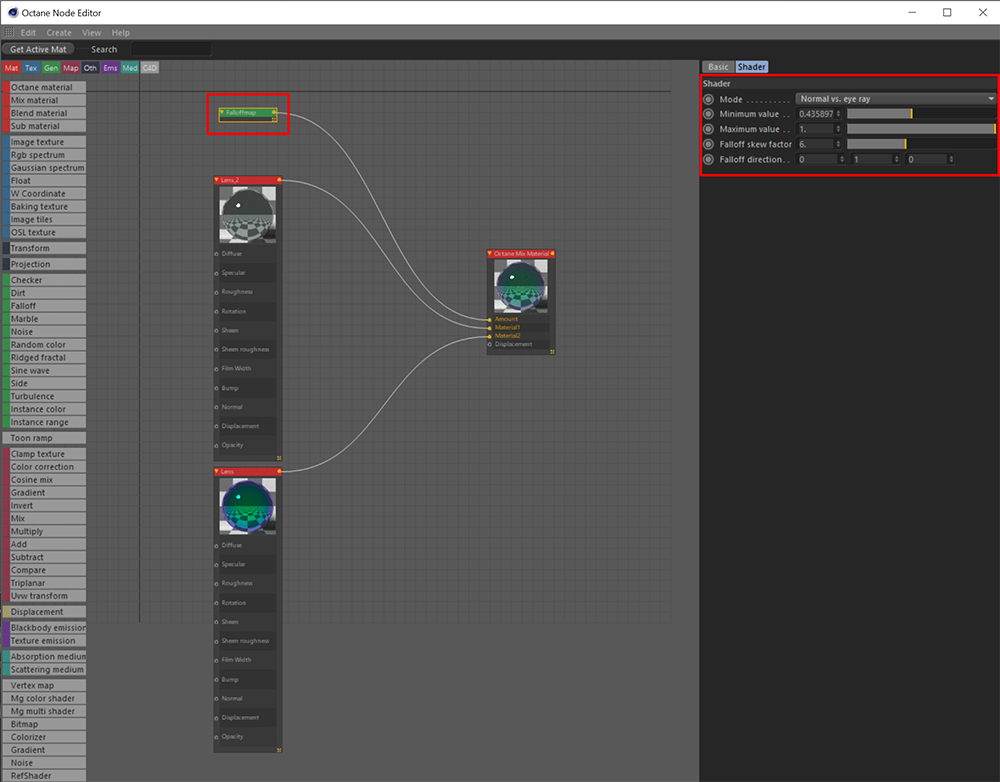
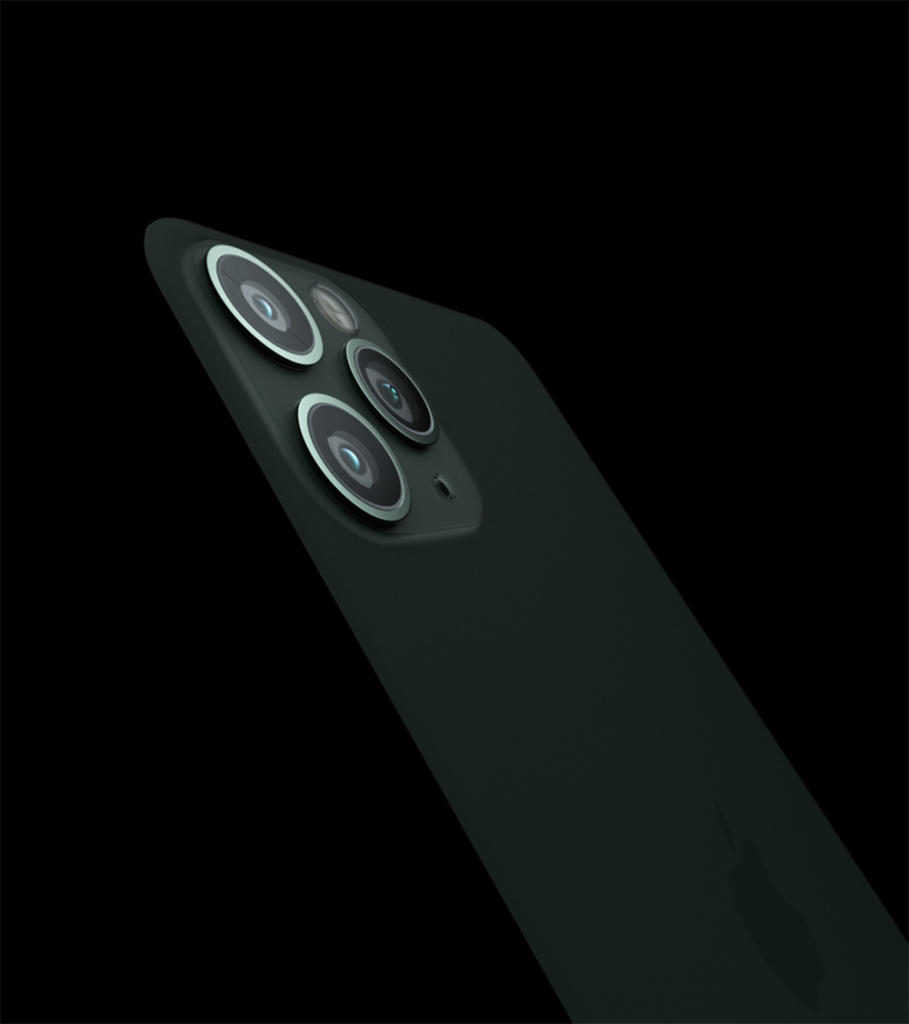
Finally, we have the lens shader. For this I used a Glossy Material. To achieve the rainbow highlight effect, I added a Film Layer. The values are super sensitive, so it’s pretty hard to pin point the desired result.
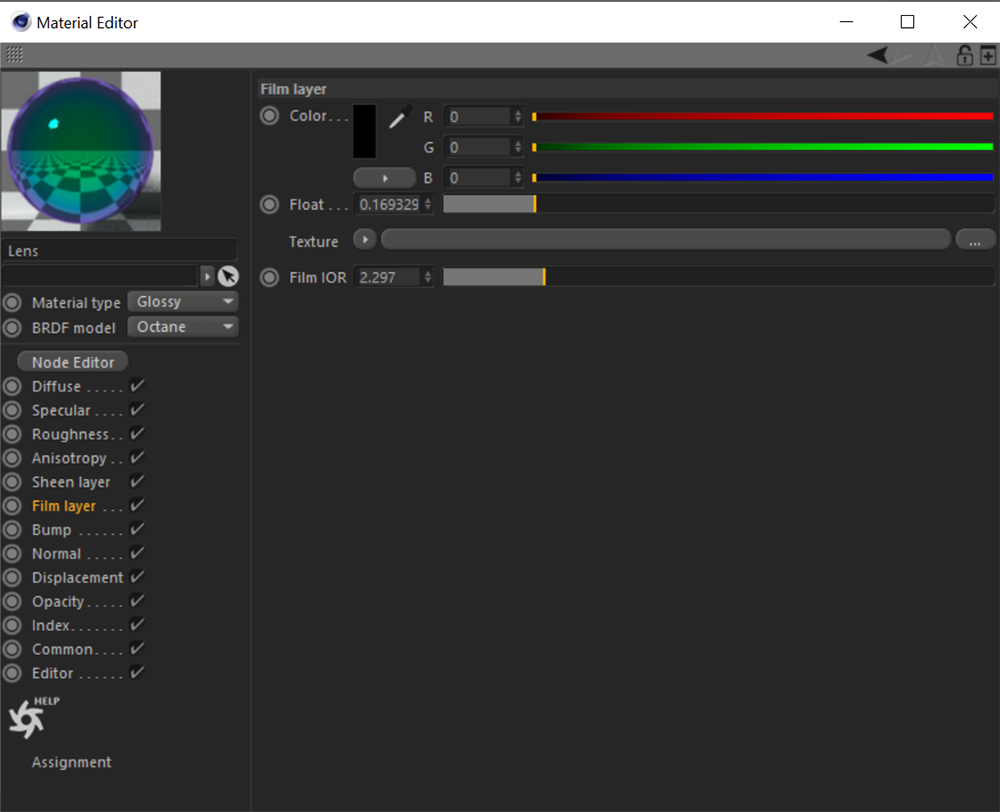
Once I had the values I was looking for, I mixed the shader with a second version with no Film Layer. I mixed the two using a Fresnel node, to have the rainbow effect only on highlights.
Lighting
Now we get to the fun part, Lighting. For my lighting setup I used default Octane area lights, with the Greyscalegorilla Area Light Maps as texture input.
To light each part of the model individually, I use the Light Pass ID feature. When you apply an Octane Object tag, under Object Layer, you can select which Light ID can affect this object. This allows you to light certain parts of the model without affecting others.
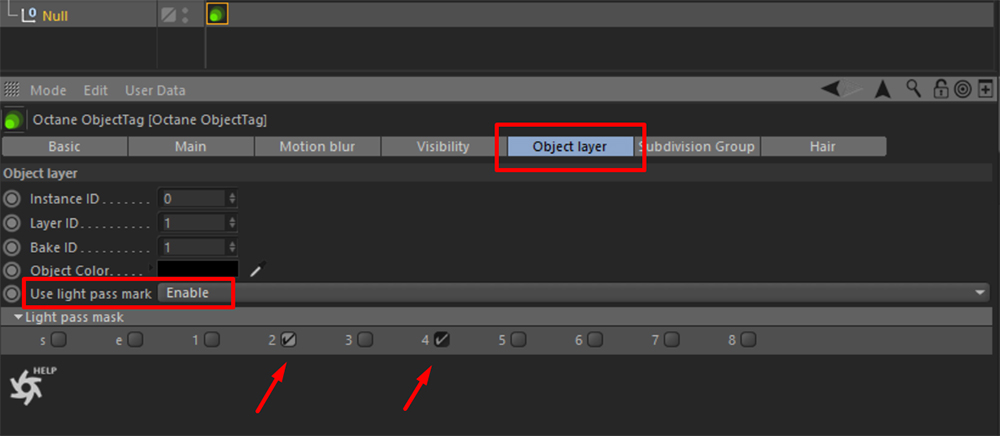
In the Octane Light tag, all the way at the bottom, there is an option to chose which Light Pass ID this light is on. This number will correlate with the ID you attributed to the Octane Object tag.
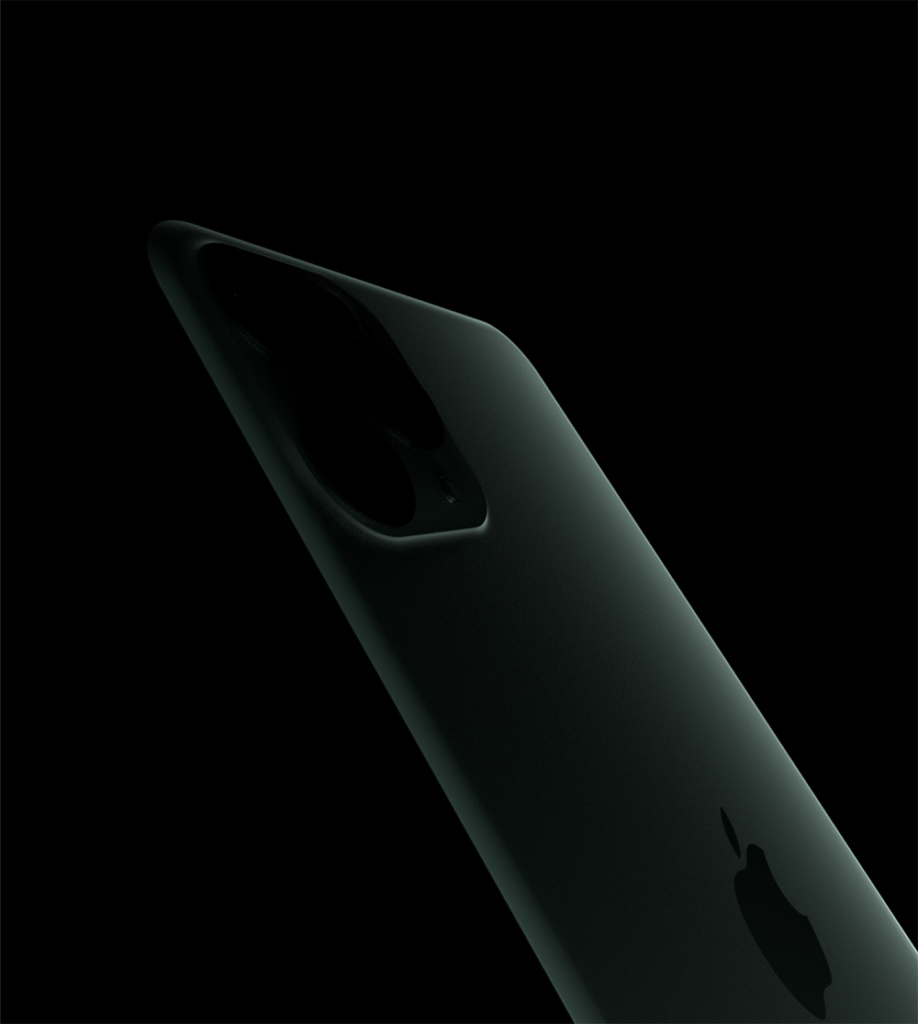
Now that we got the Light ID concept out of the way, let’s go ahead and light the model. The first light is used to create a rim highlight along the top of the phone as well as the camera bump.
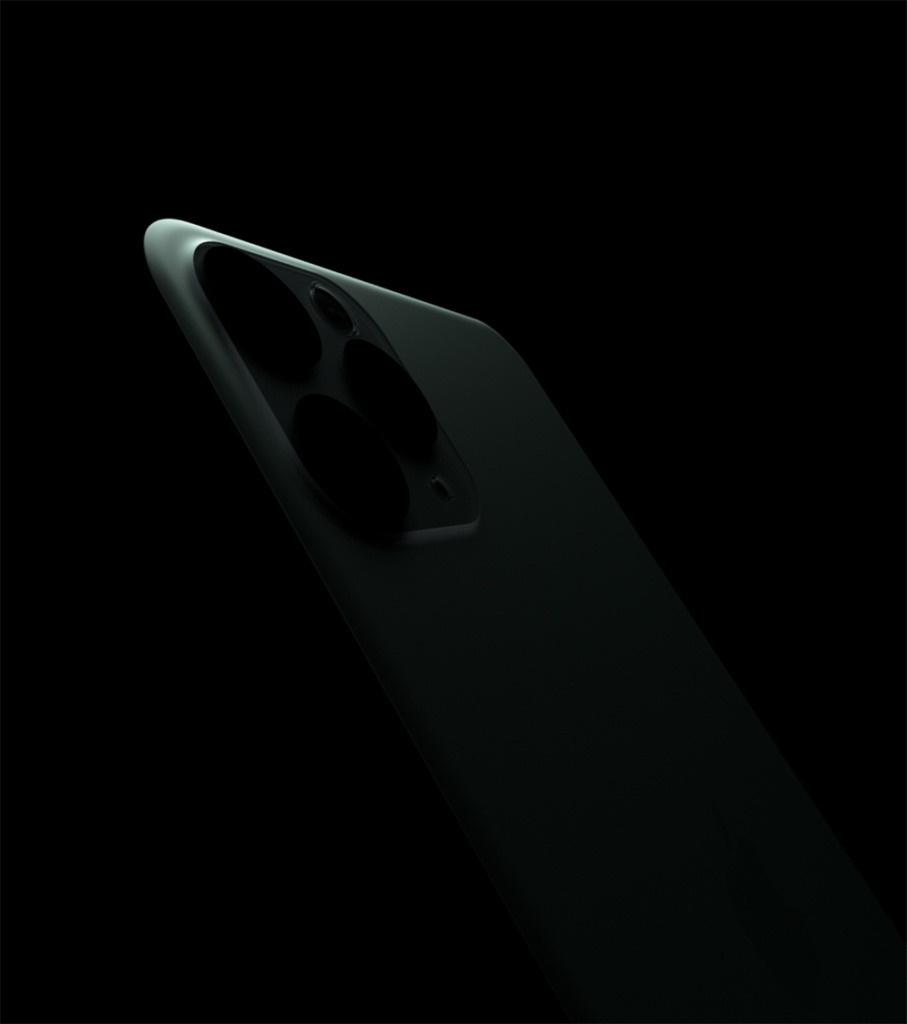
Softbox Circle – Area Light Map
The second light is a spotlight which gives a really nice gradient down the back of the phone, as well as brings the attention to the top. Which is where the focus element is located.
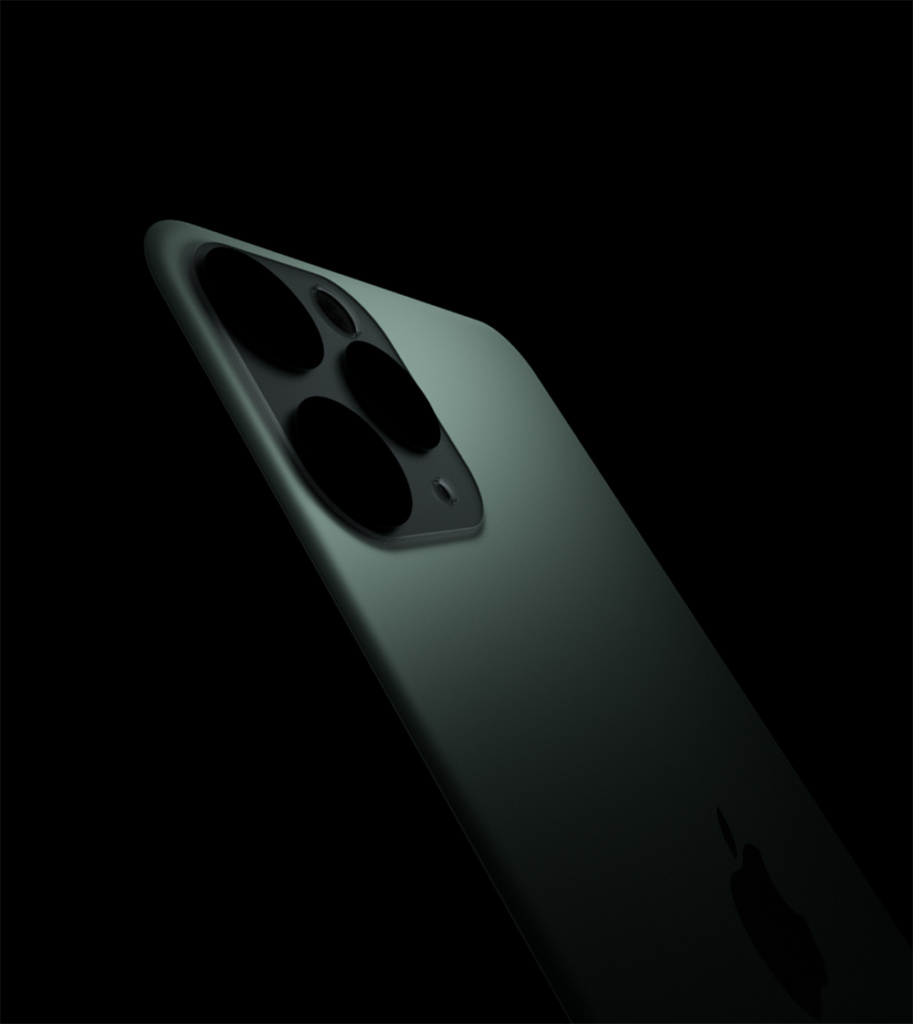
Spotlight Gradient – Area Light Map
The third and fourth lights are used to create a general light fill. I felt like the back needed to be brighter. So instead of increasing the exposure, I added some low intensity fill lights.
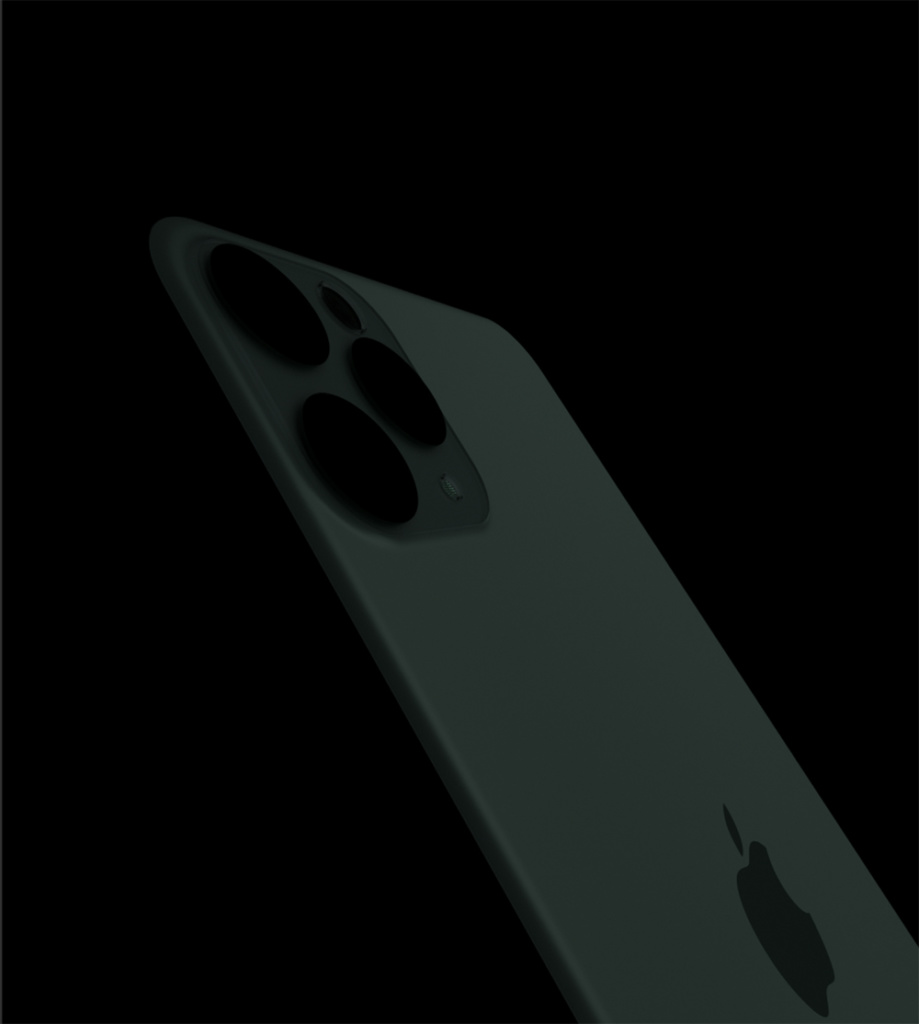
Softbox Softedge – Area Light Map
These first four lights conclude the lighting of the back of the phone.
Here is the end result with all four lights together.
Moving on to the side of the phone, which has a really nice gradient highlight, which is contrasting with a hard edge one. This is a lighting technique which is often used to show a curved edge in an eye pleasing manner.
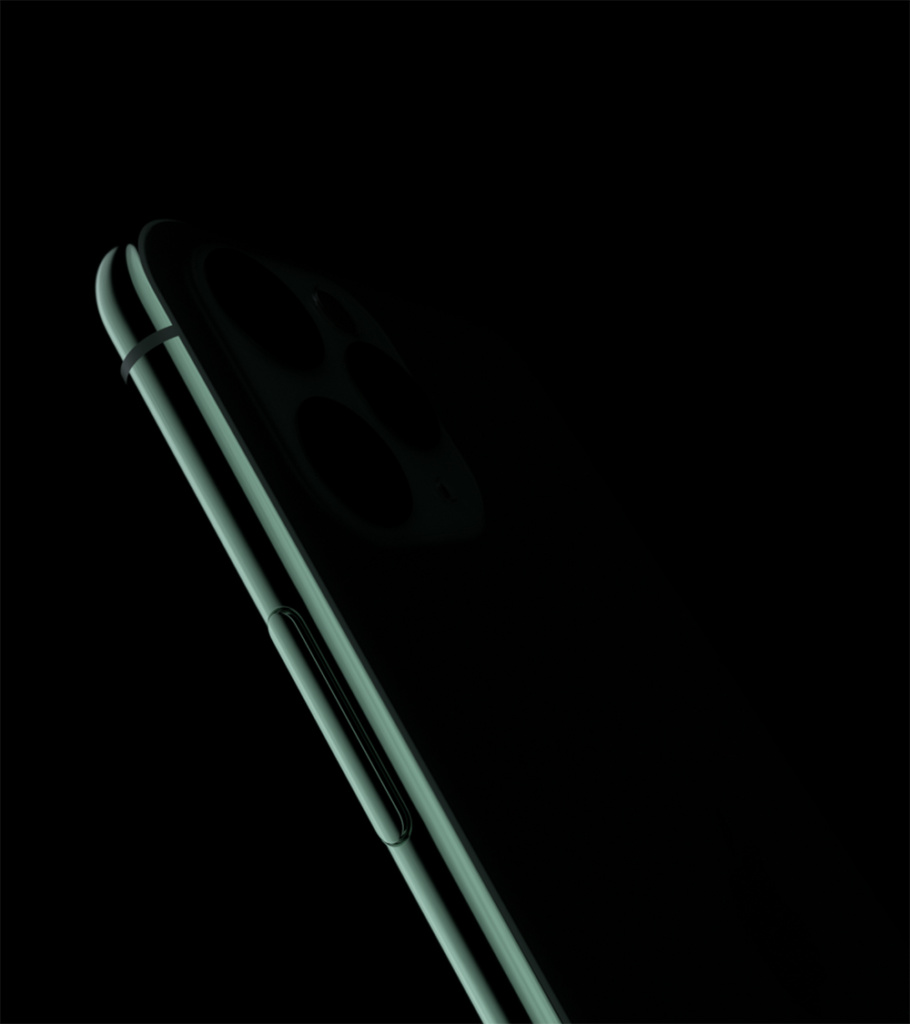
Softbox Softedge and Softbox Circle – Area Light Maps
Next up, I used two more lights that shine through the side of the frosted glass, giving it a sense of volume and depth.
This lighting technique gives a razor-thin feeling to the device, therefore making it look thinner than it actually is.
Softbox Softedge – Area Light Map
The two final lights were used to light the cameras as well another fill for the frosted glass. The second fill light also acts as a big gradient for the top glass layer above the camera module.
Spotlight Gradient and Softbox Softedge – Area Light Maps
This concludes the lighting part of this project. Overall, I used 10 area lights to light all the different parts of the iPhone.
Render Settings and Post-Production
For this last phase of the project, I’ll briefly go over my render settings as well as my post production process.
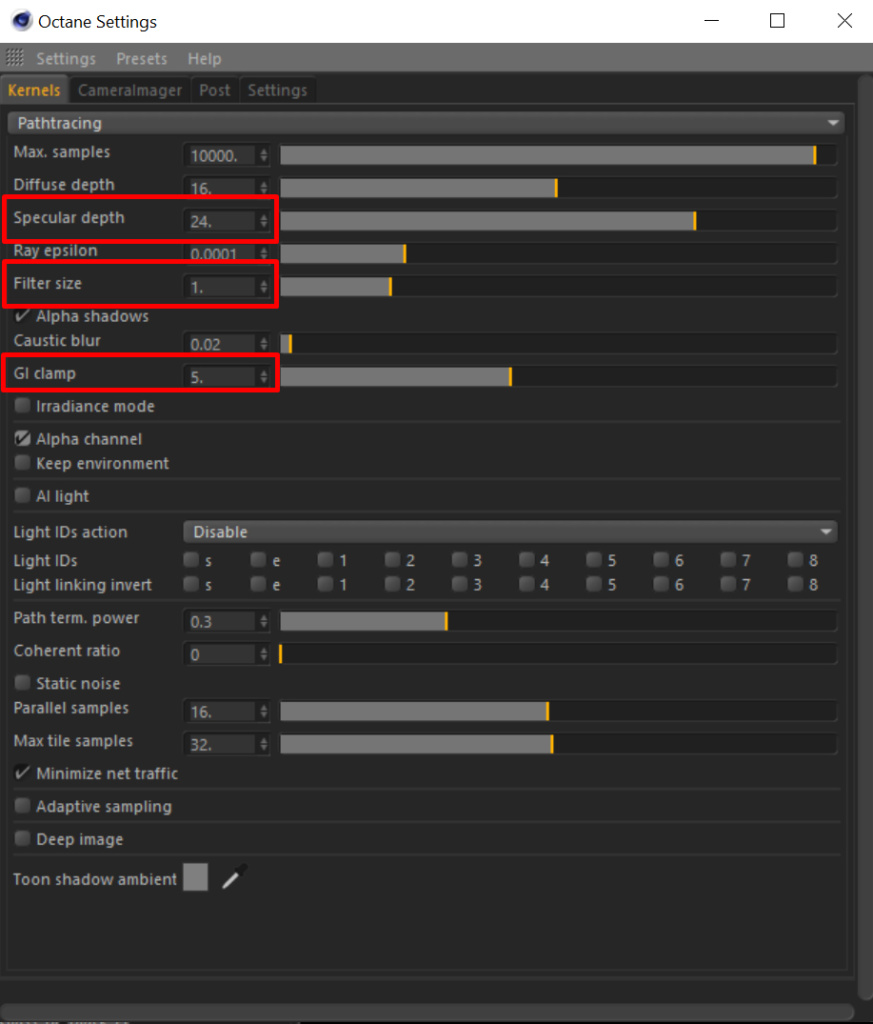
My render settings for this project were pretty simple. I set my Specular depth to 24 since the majority of the phone is glass. Next I reduced the Filter size down to 1, to get a sharper render. Lastly, I set the GI clamp to 5, to reduce the fireflies in the frosted glass.
For the Post-Production, all I had to add was a little bit of Clarity through the Camera Raw filter in Photoshop. Besides that, the render came out pretty much how I wanted straight out of Octane.
Finally, I repeated the same steps to render the front of the iPhone. Which I added in Photoshop later on. I recommend redering the two sides separately, to have as much of control as possible in Photoshop. Instead of re-rendering everything for minor position adjustments.
Special thanks to Nik V. from R4D Studios for this great interview and breakdown. You can see more of his work and follow him @RemixNv on Twitter.