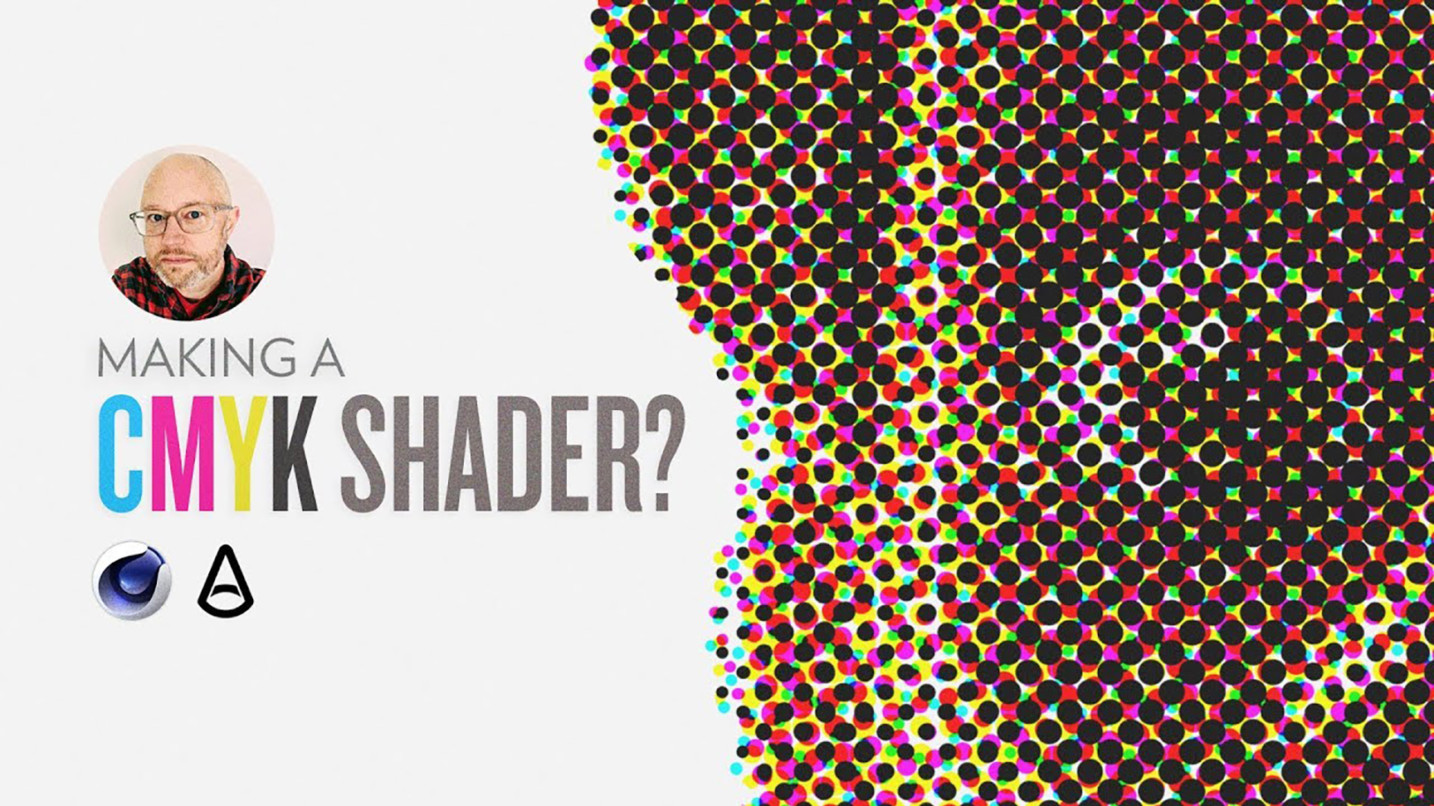
Give an RGB image a 4-color CMYK printed look with this Arnold shader. Plus download the free scene file to follow along with and experiment.
In this tutorial, you’ll see how Chad created an Arnold shader that created a 4-color CMYK printed look in Cinema 4D.
The CMYK 4-color process is a look you’re likely familiar with if you’ve ever seen a newspaper or studied a magazine up close. Cyan, Magenta, Yellow, and Black are combined layer by layer as tiny dots, which then combine to create the final look. You may have heard other terms like Four Color Printing, 4CP, Full Color Printing, or Process Printing.
After creating the Spider-Verse halftone look in Cinema 4D with Arnold, Chad wanted to see if he could take the process even further to get a real printed look.

In this process, you’ll see how he created an Arnold shader, that when piped with a traditional RGB image, would then be broken down into the 4-color CMYK. Follow along, and you’ll also be able to adjust the size of the dots to really refine the look you want.
Approaching the look is very mathematic. It was just a matter of figuring out the pitch angles for each color, then calculating and transferring the RGB colors into CMYK. Here’s the thing. Chad’s not good at math.
So with the help of Trevor Kerr (of the Greyscalegorilla Guide to Redshift) the two were able to create an Arnold OSL shader that could convert the colors.
GET EVERYTHING YOU NEED FOR BETTER RENDERS
Join the #1 Collection of Plugins, Materials, and Training to help you improve your Cinema 4D renders.
Learn How